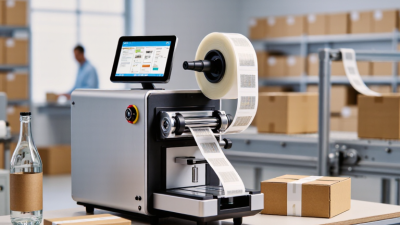
What Is Label Making and How Does It Work?
Label making is the practical process of creating labels that identify, organize, protect, or promote products. It combines design, material selection, printing, cutting, and quality inspection. A label may look simple, but its performance depends on several connected decisions. The paper, film, adhesive, ink, and finishing method must suit the product and its environment.
The process usually begins with clear information and a workable design. A designer selects readable type, suitable colors, and enough contrast for quick recognition. A production specialist then chooses materials based on moisture, heat, friction, and surface conditions. For example, a shipping label needs strong adhesion and sharp barcodes. A cosmetic label may require a smooth finish and resistance to oils.
Printing can use digital, flexographic, thermal, or other established methods. Each option affects speed, cost, color accuracy, and customization. After printing, labels may be laminated, varnished, cut, or rolled for application. Inspection checks alignment, text, color, adhesive coverage, and barcode readability. Small errors matter.
The process is not perfectly predictable. Curved containers, dusty surfaces, or changing temperatures can cause unexpected problems. Experienced teams test samples before larger production runs. They also document results, review supplier specifications, and adjust settings when evidence supports a change. Reliable label making is therefore more than attractive artwork. It is a controlled, practical workflow that balances appearance, durability, accuracy, and real-world use.
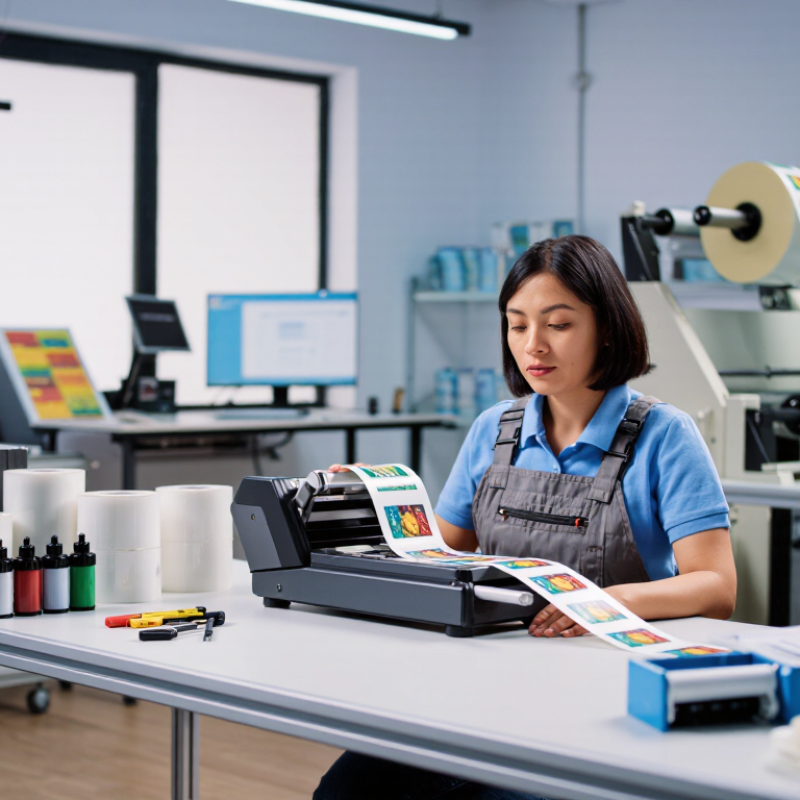
Definition and Purpose of Label Making
Label making is the process of creating labels that identify, organize, or explain an item. It may include designing, printing, cutting, and applying a label to a surface. A label can show a product name, storage detail, handling instruction, or internal reference code. The purpose is clear communication at a glance.
In a small packing room, a well-made label can prevent a box from reaching the wrong shelf. Size, contrast, wording, and placement all affect readability. A label for a cold container may need moisture-resistant material and strong adhesive. A temporary paper label needs different treatment. The surface also matters; smooth plastic and rough cardboard rarely hold labels in the same way.
Reliable label making involves checking the final result, not just the design file. Test the label under normal light, from a practical reading distance, and after expected handling. I have found that crowded text causes more trouble than poor printing. Still, some choices remain imperfect. A stronger adhesive may leave residue, while a cleaner removal may reduce durability. Small trial batches help reveal these problems before regular production begins. Accurate wording also matters, because a minor spelling error can create confusion. Date formats, symbols, and measurements should follow the needs of the intended readers. Good labels are not merely decorative. They support identification, safer handling, consistent organization, and smoother daily work.
Materials, Tools, and Design Elements
Label making turns information into a small, durable visual system. The process begins with choosing a material for the product’s surface and environment. Paper suits indoor packaging, while synthetic films handle moisture and frequent handling. Fabric labels need soft edges and stable stitching. Material thickness matters too. A heavy label can curl on a flexible container. I have found that testing a small sample prevents expensive redesigns. The first choice is not always the best one.
Tools determine how accurately a label is produced. A computer helps arrange text, symbols, spacing, and color. Cutting tools create clean shapes, while a printer or transfer method applies the artwork. A ruler, corner guide, and sample board may seem basic, but they expose uneven alignment quickly. Designers should check readability from normal viewing distance. Tiny text often looks attractive on screen, then fails in real use. That mistake is common.
Design elements give the label its working order. Clear hierarchy helps people notice the name, essential details, and instructions without confusion. Contrast improves readability, especially under weak store lighting. White space prevents crowded edges. Simple icons can support short wording, but they must remain familiar and culturally understandable. Color should reflect purpose, not personal preference alone. I sometimes remove one decorative element after testing, although deciding what to lose can be difficult. A practical review should examine adhesion, legibility, durability, and handling before final production. Feedback from actual users matters.
Step-by-Step Label Making Process
Label making starts with a clear job for the label. Before opening design software, identify the product, surface, size, and expected conditions. A food container may face moisture, while a shipping carton may experience dust and friction. These differences affect every later decision.
Choose the face material and adhesive together. The adhesive must match the surface, temperature, and handling time. A small application test can reveal lifting edges or bubbles. It is not exciting, but it prevents expensive rework. Create the artwork with readable type, strong contrast, and enough space around important information. If a barcode is required, check its size, quiet zones, and print quality. A barcode can look sharp and still scan poorly.
The production file then enters prepress. Text, images, dimensions, and color settings are reviewed before printing. Digital printing suits short runs and changing information, while flexographic printing may suit longer runs. After printing, labels are laminated, varnished, or left unfinished when the material already offers enough protection. Die cutting shapes each label, and the waste matrix is removed. Inspection should check registration, missing marks, smudges, roll direction, and count. Variable information deserves extra attention. One incorrect number can make a whole batch unusable. Finished rolls are packed carefully and recorded for traceability. A slightly curled edge may seem minor during inspection. Later, it can cause application problems. That detail deserves another test.
What Is Label Making and How Does It Work? - Step-by-Step Label Making Process
| Step | Process Stage | Main Activities | Typical Materials or Inputs | Typical Production Time | Key Quality Checks | Output |
|---|---|---|---|---|---|---|
| 1 | Requirement Definition | Confirm label size, application surface, quantity, regulatory information, durability, and finishing requirements. | Artwork brief, product specifications, text, symbols, barcode data, and packaging dimensions. | 0.5–2 hours | Information completeness, legal text, dimensions, application conditions, and barcode requirements. | Approved label specification. |
| 2 | Artwork and File Preparation | Create the layout, arrange text and graphics, define bleed and trim lines, and prepare print-ready files. | Vector artwork, approved fonts, color references, variable data, and dieline. | 1–4 hours | Image resolution, spelling, barcode readability, bleed, safe area, and correct file format. | Print-ready digital artwork. |
| 3 | Material Selection | Select the face material, adhesive, liner, and optional protective coating based on the label's environment. | Paper or synthetic face stock, pressure-sensitive adhesive, release liner, varnish, or laminate film. | 1–3 hours | Compatibility with temperature, moisture, chemicals, surface texture, and expected service life. | Approved material construction. |
| 4 | Prepress and Color Setup | Convert artwork for the selected printing method, separate colors, add registration marks, and set print controls. | Print-ready file, color profiles, plates or digital press settings, and production job ticket. | 1–3 hours | Color separation, overprint settings, trapping, registration marks, and print alignment. | Production-ready print setup. |
| 5 | Printing | Print text, graphics, barcodes, and variable information onto the selected label material. | Label stock, inks or toner, printing equipment, and approved production file. | 15–90 minutes per job | Color consistency, print density, registration, smearing, missing elements, and barcode contrast. | Printed label web or sheets. |
| 6 | Protective Finishing | Apply varnish, laminate, or another coating to improve resistance to abrasion, moisture, chemicals, or ultraviolet exposure. | Protective coating, laminate film, adhesive layer, and curing or drying settings. | 10–45 minutes | Surface coverage, adhesion, bubbles, wrinkles, gloss level, drying, and coating uniformity. | Finished label material. |
| 7 | Die-Cutting or Slitting | Cut labels into the required shape or width while keeping the release liner intact for pressure-sensitive labels. | Finished label web, cutting tool, rotary blades, or slitting equipment. | 15–60 minutes | Label dimensions, corner radius, cut depth, edge quality, waste removal, and repeat accuracy. | Individually shaped or slit labels. |
| 8 | Inspection and Testing | Inspect samples or production rolls and test adhesion, readability, dimensions, and resistance when required. | Finished labels, measuring tools, barcode verifier, adhesion test surface, and inspection checklist. | 15–60 minutes | Visual defects, barcode scan quality, adhesive performance, dimensional tolerance, and variable data accuracy. | Accepted production lot or corrective-action report. |
| 9 | Rewinding, Packing, and Delivery | Rewind labels into rolls or pack them as sheets, identify each batch, protect them from damage, and prepare them for shipment. | Accepted labels, cores, cartons, protective wrapping, batch records, and packing labels. | 15–60 minutes | Roll direction, quantity, splice control, packaging condition, batch identification, and shipping specifications. | Packaged labels ready for application. |
Printing, Cutting, and Finishing Methods
Label making turns artwork into a usable surface for products, packages, and equipment. The real work happens during printing, cutting, and finishing. A small shift can damage alignment, readability, or the label’s final appearance. Before production, technicians check the material, ink compatibility, and required durability. This step is easy to underestimate. Digital printing suits short runs and variable information. Flexographic printing uses plates for efficient, consistent larger batches. Screen printing creates dense ink layers for strong visual impact. The best method depends on quantity, detail, surface, and expected handling.
After printing, labels are cut into their final shapes. Rotary die-cutting uses a shaped tool for fast, repeatable results. Kiss cutting separates the label without cutting through its liner. The liner remains intact. Laser cutting avoids physical dies and handles detailed shapes effectively. However, heat may affect sensitive materials or nearby printed areas. Registration marks help sensors align the cut with the artwork. Still, machines are not infallible. Dust, material tension, or stretching can create small errors. That is where careful inspection matters.
Finishing protects the print and changes the label’s feel. Lamination adds a protective layer against moisture, rubbing, and light handling. Varnish can highlight selected areas or add an overall surface sheen. Foil details create contrast, but they require accurate pressure and registration. Rewinding also matters because uneven rolls can cause application problems. In practical production, attractive labels sometimes fail because of poor winding or weak material selection. The design was fine. The process was not. Continuous testing remains necessary, especially when labels face cold storage, friction, or curved surfaces.
Common Uses and Quality Considerations
What Is Label Making and How Does It Work?
Label making combines design, material selection, printing, finishing, and application. A digital file controls text, symbols, colors, and variable information. The chosen stock may include paper, film, adhesive, or a protective coating. Printing can use digital, flexographic, or offset methods. Cutting then shapes the label, while inspection checks readability, alignment, and color consistency.
Common uses include product identification, logistics tracking, ingredient communication, safety warnings, and retail presentation. In warehouses, labels must survive friction, moisture, and changing temperatures. On food packaging, legible text matters more than decorative effects.
Smithers reported that the global label market was worth about 46.1 billion US dollars in 2023 and may reach 55.3 billion by 2028. This growth reflects wider use across packaging, transport, and industrial operations. However, market growth does not guarantee quality. A beautiful label can still fail if its adhesive lifts or its barcode scans poorly. That is an uncomfortable but practical lesson.
Tips: Test labels on the actual container, not only on a sample sheet. Check adhesion after refrigeration, handling, and exposure to moisture. Measure barcode quality with calibrated equipment. Verify small text at normal reading distance. The International Organization for Standardization’s ISO/IEC 15415 standard supports two-dimensional barcode quality assessment. Color should also be judged under controlled lighting. Human review remains necessary. Automated inspection misses context sometimes. Even experienced teams should record defects, review supplier certificates, and repeat tests after material changes.
Related Posts
-
How to Choose the Best Label Making Machine?
-
How to Choose Label Making Machines for Global Sourcing?
-
Top 10 Label Machine Types You Should Consider Buying?
-
Best Label Machine for Efficient Packaging Solutions?
-
Top Industrial Label Printers to Boost Your Business Efficiency and Productivity
-
2026 Best Label Printers for Your Business Needs?